


Help
How can we help?
With the BIMsmith Revit Plugin, you can quickly load Revit families from BIMsmith Market, configure the entire wall, floor, ceiling, and roof Revit systems BIMsmith Forge, and save your favorite products to your MyBIMsmith account - all without leaving the Revit interface.
The BIMsmith Revit Plugin works with Revit 2017, Revit 2018, Revit 2019, Revit 2020, and Revit 2021.
Watch:
View this short video explaining how to install the BIMsmith Revit Plugin, or follow the step-by-step instructions below.
1. Download the BIMsmith Revit Plugin
To install, you will first need to download the BIMsmith Revit plugin to your computer. Find the plugin by going to www.bimsmith.com/revit-plugin.
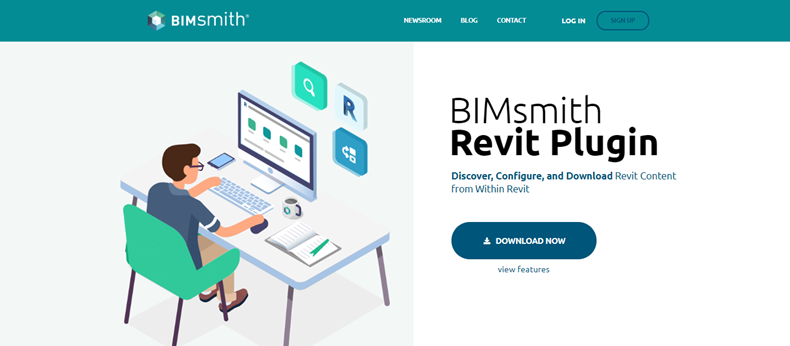
Note: You will need to log in to your BIMsmith account, before being able to download the plugin.
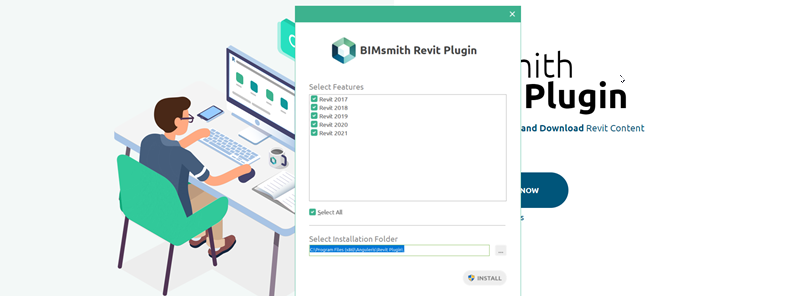
2. Select Which Revit Versions You Need
After downloading the plugin, a dialog box will pop up with all available versions of the BIMsmith Revit plugin. Select all available versions or select the most up-to-date version.
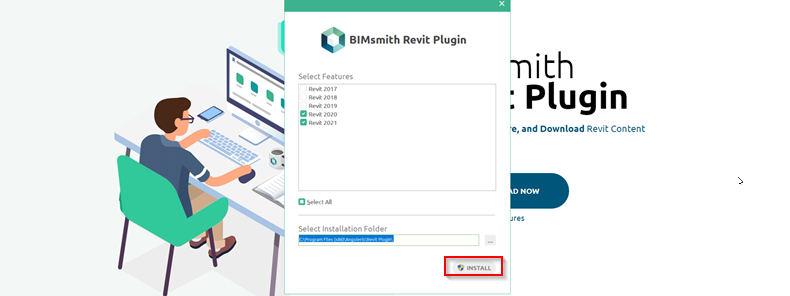
3. Click "Install"
After selecting the versions that you need, click "Install," which is found at the bottom of the dialog box.
4. Wait While The Plugin Is Installed
Once clicking "Install," the Revit plugin will begin to install onto your computer.
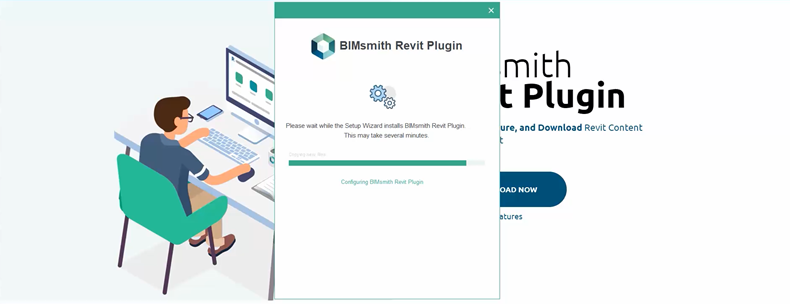
Note: The installation can take a couple of minutes.
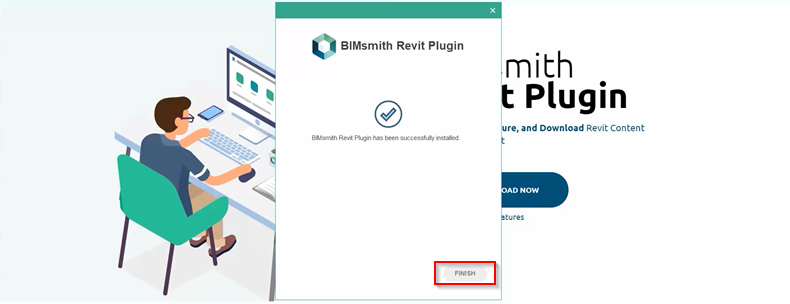
5. Finish the Installation
Once the installation is done, click "Finish."
6. Launch Revit
When you launch Revit, you should have an additional tab at the top that will show the BIMsmith name and plugin.

Featured Brands: