


Help
How can we help?
FAQ
BIMsmith Forge® is a free cloud tool that makes the creation and placement of multi-layer Revit assemblies easy.
Forge uses a massive database of over 500,000+ Revit materials to enable you to select various building products to place in a wall, roof, ceiling, or floor system. Once you tell Forge the combination you would like to build, Forge uses patented technology to actually build a BIM-ready system behind the scenes.
Click Start Designing to try it for yourself, or see step-by-step how to use Forge's 500,000 Revit materials in your project.

How to Build With 500,000 Revit Materials in BIMsmith Forge
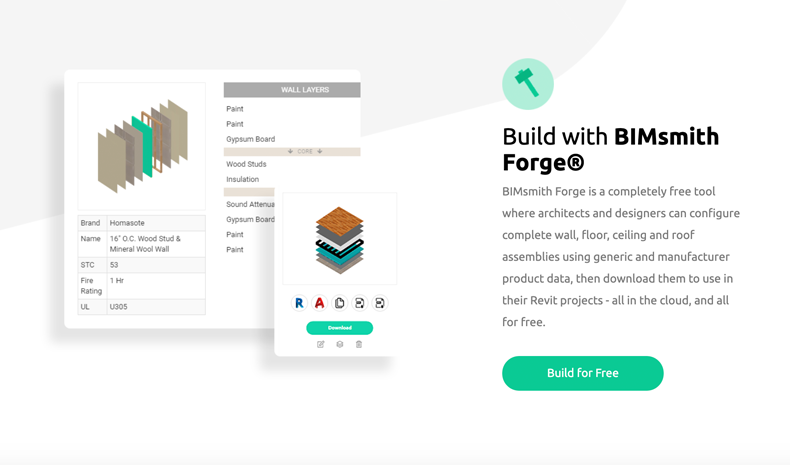
1. Visit BIMsmith.com and click “Build for Free”
The BIMsmith platform has two main applications: BIMsmith Forge (Revit configurator) and BIMsmith Market (Revit families and research platform). While you can download individual Revit materials on BIMsmith Market, using Forge enables you to combine Revit materials from many manufacturers at once.
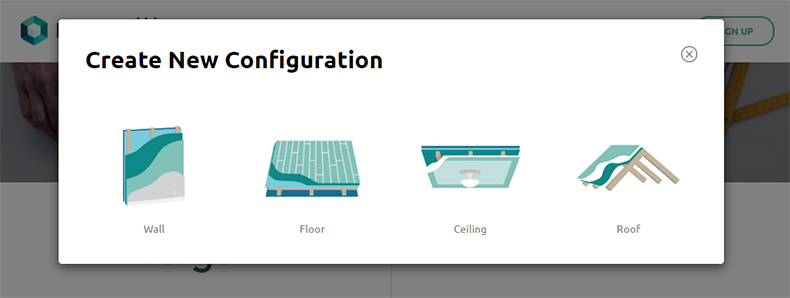
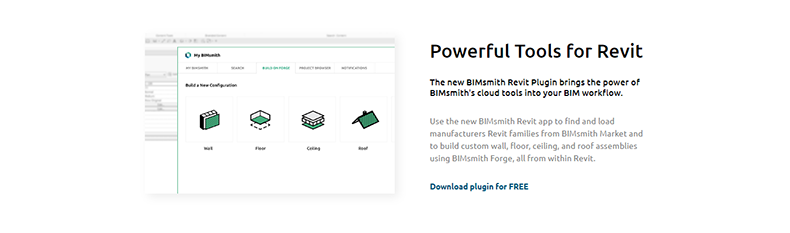
2. Select the type of Revit system you would like to build.
BIMsmith Forge configures four main types of systems: Walls, Floors, Ceilings, and Roofs. Each section of the Forge configurator is tailored with specific products for the type of system you are building.
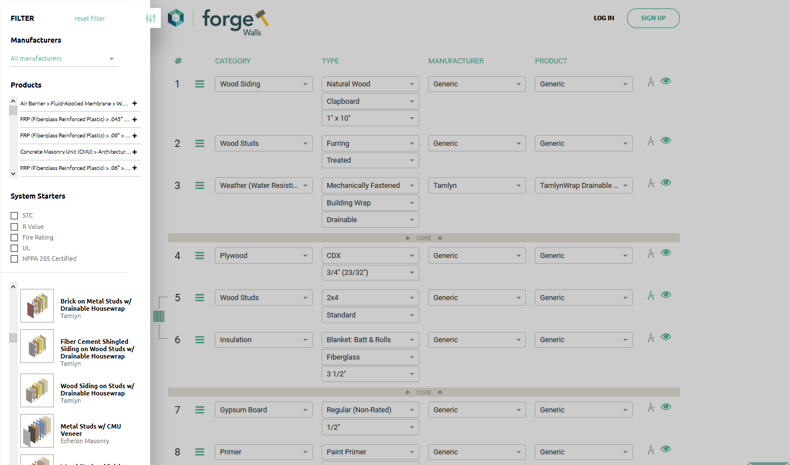
3. Use the drawer on the left-hand side of the screen to choose from pre-built systems, manufacturers, or products.
This toolbar is your best friend when designing in BIMsmith Forge. You can select a pre-built system starter, so all you need to do is make small tweaks and changes. You can also browse products and system starters by manufacturer, or even by technical criteria like UL Rating, Fire Rating, STC Rating, and more.
4. Select a Category, Type, Manufacturer, and Product for each layer of your system
A few years ago, BIMsmith underwent the large undertaking that we called the Building Genome Project in attempt to designate into categories the broad spectrum of building products that might be used in a multi-layer wall, roof, ceiling, or floor system.
BIMsmith Forge uses these categories to classify every product that you might want to place in your system.

For each category, there are typically multiple variations that help narrow down the selection for your specific application.
Once you’ve selected the Type, you can either select a Manufacturer or Generic equivalent from the dropdown. (Obviously, there’s more BIM-related value from selecting manufacturer products, but we get that sometimes your project or firm requires you to select a generic placeholder.)
Finally, select the product that best matches your intentions.
5. Use the material browser to make color and texture selections.
Often overlooked is the compass icon to the right of each layer, which opens up the Forge Material Browser for you to select any additional finishes that you would like in your system.
From selecting paint colors from Sherwin-Williams to paver patterns from Belgard Commercial to shingles from GAF and fasteners from Grabber, the material browser allows you to get as granular as you want with your system before digging into Revit.
Each material is carefully crafted to precisely represent its real-world equivalent with colors, textures, and seamless images. BIMsmith Forge Materials also include all the applicable hatch patterns and identity data you need to streamline your workflow in plans, elevations, and sections.
6. Use the BIMsmith Forge visualizer to view your system as it takes shape.
Click the “+” button to add additional layers. You can also duplicate, delete one, or delete all as you go. As you design, your system is displayed in the visualizer underneath, which you can explore and manipulate to assist you as you design.
Pro Tip: Don’t forget to name your system. The assembly will be visible to you and your firm in your MyBIMsmith Account using the name and visualizer preview, so make it descriptive or in line with your firm’s naming conventions.

7. Click “Build” to complete your system and create a Revit file.
The secret sauce happens behind the scenes, and the next screen will allow you to download a .zip file with your Revit assembly ready to go.
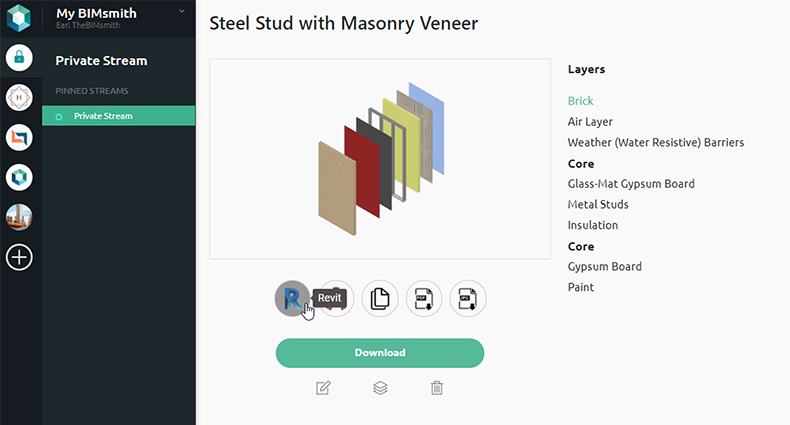
8. Download your new Revit system from MyBIMsmith.
Your new system opens up in a new window within MyBIMsmith, your free cloud storage account in which you can save every single one of your assemblies from BIMsmith Forge or Revit families from BIMsmith Market to store for later and share between your teams and projects.
On this screen, you can download the Revit project containing your new assembly, but you can also include it in AutoCAD format, as well as specifications, cut sheets, and images for every single layer in the system. It’s that easy.
9. Open up the system and transfer to your project.
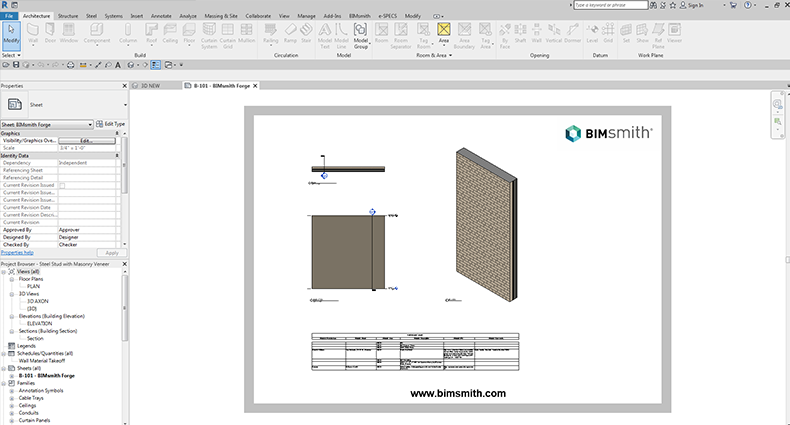
Your Revit assembly downloads as a .rvt Revit project, so all you’ll need to do is open it up, copy the system, and then paste into another project.

10. Download the BIMsmith Revit Plugin to take care of this entire process without ever leaving Revit.
Now that you’ve done it the normal way, you can also download the BIMsmith Revit Plugin to bring the full functionality of BIMsmith Forge into Revit so you don’t have to use your browser at all. Download the BIMsmith Revit Plugin here.
Always Free. Always Awesome.
And the best part of it all is that BIMsmith has always been and will always be 100% free. No exceptions.
Try out BIMsmith Forge, or download the BIMsmith Revit Plugin to try it in your project.
As of right now, it is not possible to upload files/BIM content to MyBIMsmith. MyBIMsmith cloud storage is limited to products and Revit families located on BIMsmith Market, and custom Revit assemblies built on BIMsmith Forge.
If you are interested in opportunities to upload and store your firm's BIM content in the cloud, we recommend getting in touch with some of our partners, like Unifi or Avail.
Can't remember your password, or just want to update it? Changing your password with BIMsmith is easy.
1. Visit BIMsmith.com
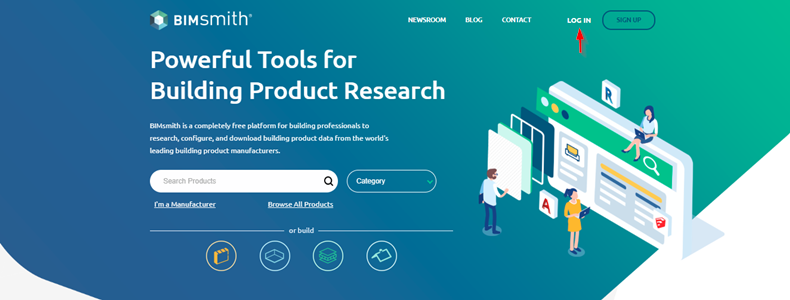
If you have to reset your password, you will need to go to BIMsmith and click the "Log In" button. You can also do this from BIMsmith Market.
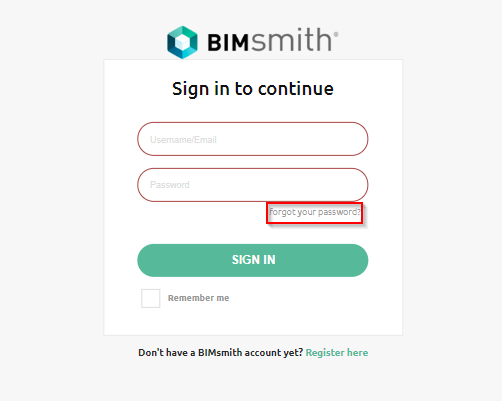
2. Click "Forgot Your Password?"
Once you click "Log In", it will take you to a separate page where you will have to input your email and password. If you have forgotten your password, you can hit "Forgot Your Password?"
3. Enter Your Email
After hitting "Forgot Your Password?", you will be directed to input your email address and click "Send Recovery Link".

4. Check Your Email and Follow the Link
After you enter your email address, BIMsmith will send a recovery link to your email. If you see the email, click on the link to reset your password. (If you don't see the email, wait a few minutes. If after 5 minutes the email still has not displayed, try checking your spam/junk filter. If you still don't see it, try submitting a second Password Reset request.)

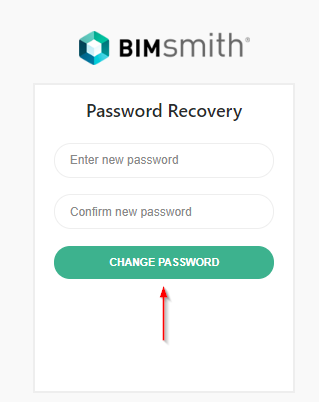
5. Enter Your New Password
Enter your new password, and then click hit "Change Password" to confirm the changes to your account.
BIMsmith is the leading platform for building professionals to perform product research. Designed by a team of former architects, here is an overview of some of the main features of BIMsmith Market that can help you research, discover, and design with products and Revit families from the world's leading manufacturers.
Video Overview (1:55):
How To Use BIMsmith Market: 6 Steps
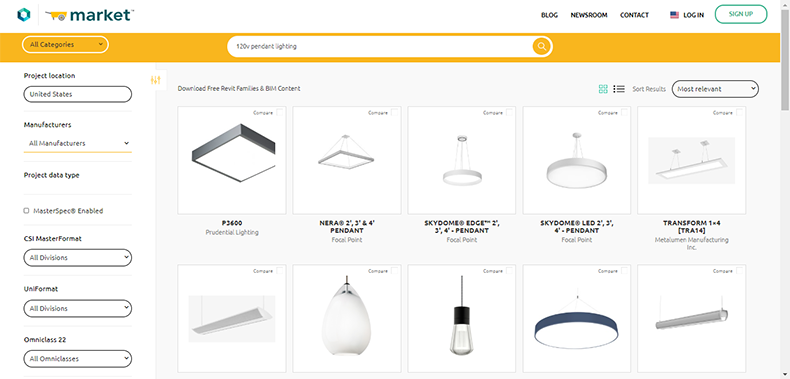
1. Search for Exactly What You Need
One option is to begin with a search for exactly what you are looking for. You can even include detailed modifiers that describe exactly what you need, like "120v pendant lighting" or "3000 lumen projector."
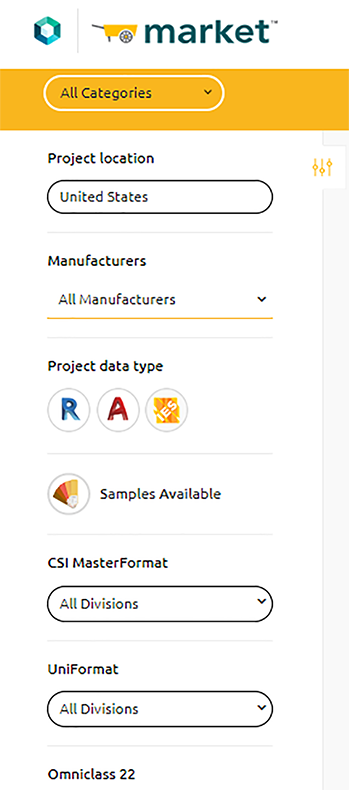
2. Use Filters to Narrow Your Search
You can also browse by filtering products by different criteria. Whether you want to be sure that a product is available where your project is located, has certain certifications, or has material samples available, you can combine the criteria you need to find the right selection.
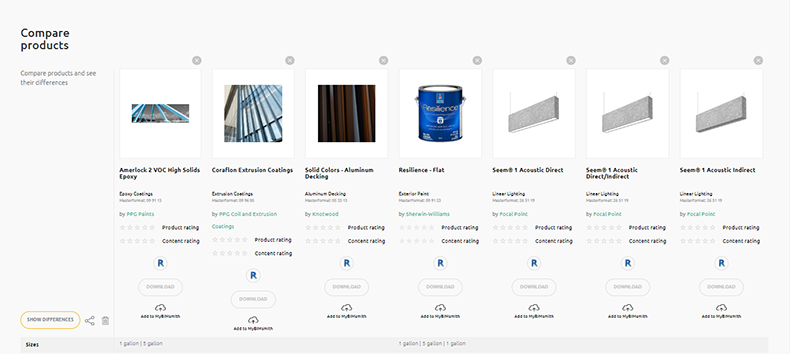
3. Compare Products to See Their Differences
Once you have narrowed down your selection, check the Compare Box and click "Go To Compare" to see product data side-by-side.
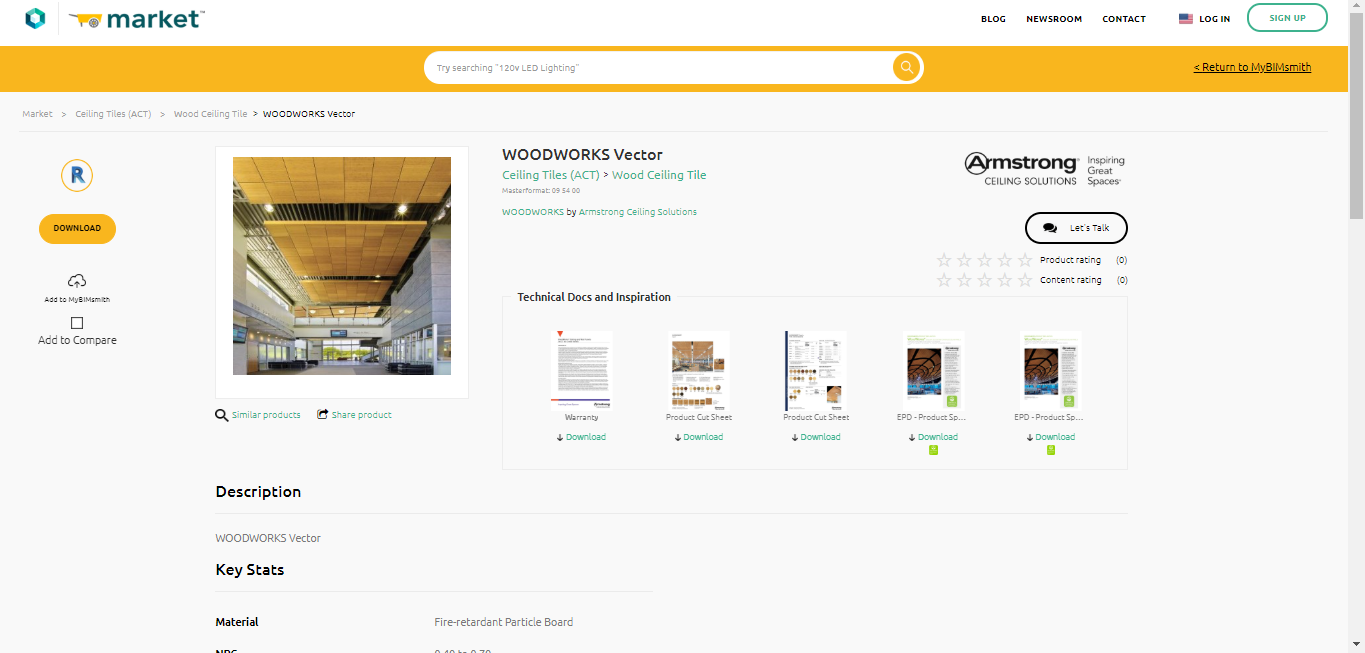
4. Communicate Directly with Brands
If you have a question or want to request specific BIM content, you can get in touch with a manufacturer directly from any product page or manufacturer hub page.

5. Build an Assembly Using BIMsmith Forge®
Some brands have products that integrate with BIMsmith Forge, BIMsmith's patented Revit assembly configurator. Click on "Build On Forge" to build a Revit assembly from scratch, or use a pre-built system starter for even faster results.
6. Download the Free BIMsmith Revit Plugin
You can also use the free BIMsmith Revit Plugin to bring the power of both BIMsmith Market and BIMsmith Forge into your products without leaving Revit.
With the BIMsmith Revit Plugin, you can quickly load Revit families from BIMsmith Market, configure entire wall, floor, ceiling, and roof Revit systems BIMsmith Forge, and save your favorite products to your MyBIMsmith account - all without leaving the Revit interface.
The BIMsmith Revit Plugin works with Revit Revit 2017, Revit 2018, Revit 2019, Revit 2020, and Revit 2021.
1. Visit the BIMsmith Revit Plugin Download Page
You can find the BIMsmith Revit Plugin in two different ways. The first way is to visit www.bimsmith.com/revit-plugin.

The second way is to go to www.bimsmith.com, and scroll all the way to the bottom of the page, where you will find a link to the BIMsmith Revit Plugin.
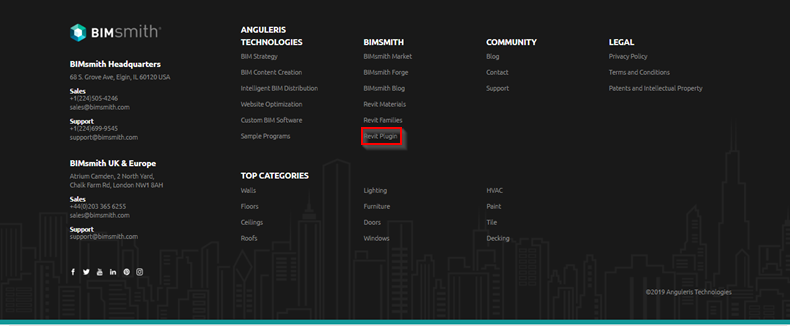
Note: You will need to login to your account in order to download the Revit Plugin.
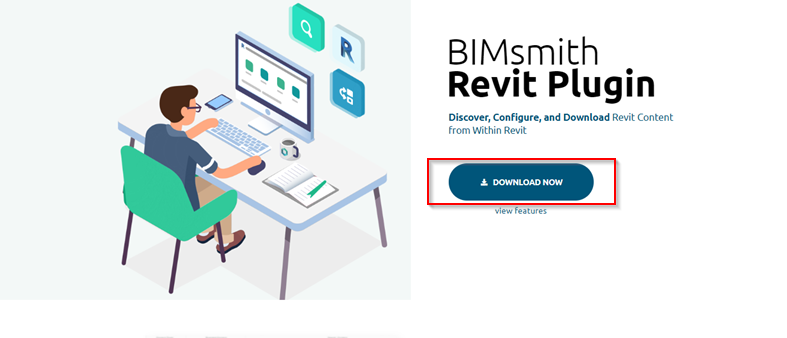
2. Find the Download
After logging into your account and navigating to the BIMsmith Revit Plugin page, you will be able to download the plugin for free. Just look for the "download now" button.
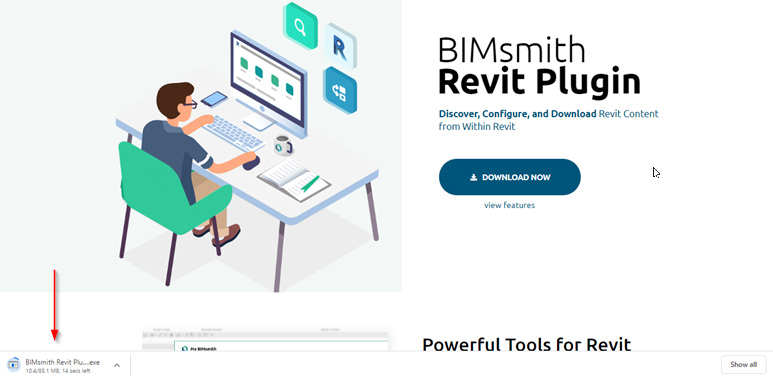
3. Download
Once you hit the "Download Now" button, a box will appear on the bottom of your screen, showing you that the download is starting. Once the download has completed, you will be able to find the Revit Plugin in your "downloads" folder. and begin the installation process. (The BIMsmith Revit Plugin works with Revit 2017, Revit 2018, Revit 2019, Revit 2020, and Revit 2021.)
Unlike other content platforms, BIMsmith does not ever share user information with third parties unless explicitly given permission.
As a team of architects and other building professionals, we understand and value the essential role that privacy has in the product research process. We know that when you provide BIMsmith with any amount of information about yourself, you are entrusting us with something valuable. We've been in the position of receiving too many unwanted or unrelated sales calls, and believe that every individual should have the choice to share their contact information or not.
That's why we never share personal identifying information of users without consent.
When does BIMsmith share personal identifying information of users?
Only if you tell us to. Because we understand that it is often necessary to reach out directly to a manufacturer for product help or support, BIMsmith has built-in tools (like the "Let's Talk" button) that enable users to contact manufacturers. If this happens, the user must consent to have their contact information shared with the manufacturer (a third party) - simply because it is required to fulfill the request.
As features are added to the BIMsmith platform, any and all of them that require sharing personal identifying information with third parties will behave in the same way.
So, as clearly stated in our Privacy Policy, BIMsmith will not ever share any information that can singularly identify any user unless given specific permission.
Manufacturers can provide an IES file that will make a photometric web in Revit to represent the light source more accurately in rendered images.
What is an IES File?
An IES file is a text file that typically corresponds to a single lighting fixture model. IES files help represent the photometric properties of lights more accurately in design tools like Revit.
How to Use an IES File in Revit
1. Download and Unzip the IES File
To use an IES file downloaded from BIMsmith Market in your Revit project, unzip the file and store the .ies files somewhere that you won’t delete them.
2. Load a Family
Next, load the Revit family into your project, using the type catalog if available. To use the correct .ies file, check that there is an .ies for the model that you want.
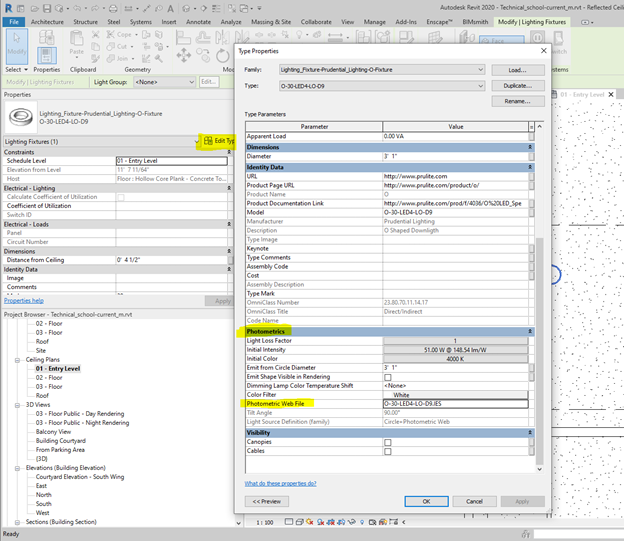
3. Open the Properties Box
Once loaded, place and select an instance of the family. Then go to “Edit Type” in the properties box and scroll down to the “Photometrics” section. There is a parameter called “Photometric Web File” which is a URL type parameter.
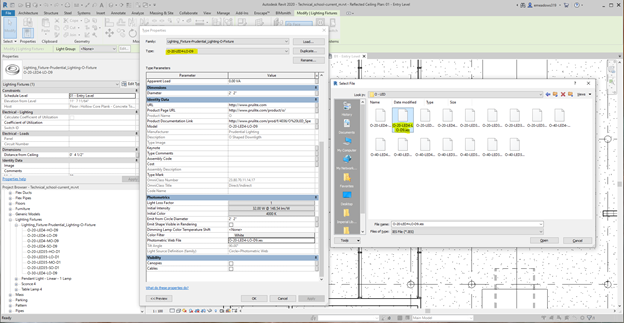
4. Load the IES File
Click the link and navigate to the folder where you saved the .ies files, then match the name of the .ies file to the model number of the lighting fixture. If you’re using multiple model numbers, you will have to load each .ies separately.
Quality is an essential concern for building professionals looking for Revit families.
From being too "heavy" or large in file size, to containing outdated information, unnecessary parameters, or even just bad geometry, we know that as architects there a million things that can upset the delicate balance of our BIM projects. (Sidenote: here's our article about The 20 Rules of Properly Built Revit Families.)
That's why all Revit families hosted on BIMsmith are created by the BIMsmith team of architects or are put through a rigorous series of Quality Assurance tests to guarantee that they are lean, well-balanced, and accurate.
It's our promise that everything we publish on BIMsmith meets our own standards as architects.
If, for some reason, you find something that doesn't appear to meet these standards, please let us know right away and we'll be happy to make the necessary fixes.
When a Revit family requires a large number of types (often more the 10 +/-), a .txt file can accompany the family with a list of types as well as the corresponding parameter/values needed to populate the types in the Revit Project. Once loaded into Revit (see below), this .txt file will be displayed in Revit as a scrollable and filterable dialog modal. Once you select the types that you would like to load into the project, only the selected types will be loaded into the project, keeping the size of the file to a minimum.
How to Load a Type Catalog
There are two main ways to load a Type Catalog in Revit.
Option 1: Load via “Insert > Load Family”
This is a very straight forward method with very few steps. By loading the family through the insert tab, Revit will allow you to navigate to the appropriate folder, see that there is a .txt file with the same name, and open the type catalog prior to loading it into the project. Keep in mind that you will only be selecting the .rfa file, the .txt file is not visible through the Revit navigation browser.
Option 2: Drag and drop from your browser into the Revit project directly.
This is an option many users will default to out of habit or convenience. Though there is nothing wrong with adding a family to your project by drag and drop, it does require an extra step to get Revit to apply the type catalog.
Typically, when using the drag and drop method, the family will come into the project as a default type. When a type catalog is needed, most content will call attention to this by naming the default type something like “Not a Type – Load Type Catalog” (see Image 1 Below:)

Image 1: Revit Project Browser will often show the default type as "Not a Type - Load Type Catalog"
To trigger Revit to apply the type catalog, right-click on the Family (not the type) in the project browser and select “Reload…”. Revit will typically have the correct path to the folder where you saved the original family, however, if that is not the case just navigate to the location where the family is saved and select the Revit File. Revit will not display the .txt file, only the Revit family with the same name (see below Image 2:)
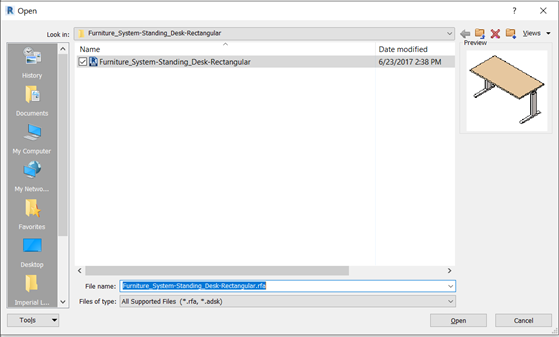
Image 2: Only the Revit family file will display, rest assured by selecting the family, Revit will pull the ..txt file with the same name and open the Type Catalog dialog modal.
Helpful Tips:
A few things to note before you get to loading and using a type catalog.
First, when downloading Revit content and a type catalog is needed, a “.txt” file with the same name as the family will be included with your download. It is critical that neither of the files (.rfa or .txt) be renamed, as Revit will be looking for the names of both to match.
Second, when selecting from the list of types (leftmost column) you can choose a single type, consecutive types (by holding “Shift” while selecting), or nonsequential types (by holding “Ctrl” when selecting the type rows) (see image 3 below:)
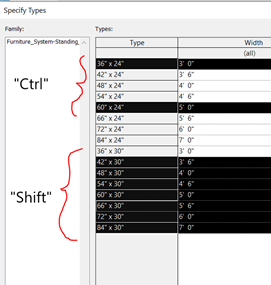
Image 3: Use “Ctrl” and select specific/nonsequential types, us “shift” and select for a group selection.
Additionally, when the dialog modal appears in Revit showing type options, keep in mind each parameter column has a filter. This may not be that helpful when there is a manageable amount of types, but many Revit families (lighting, furniture, etc.) have hundreds or even thousands of types. The best way to handle that many options is to select a filter option from as many parameters (columns) as you can. This will dramatically reduce the number of options that you don’t want loaded into your project (see below image 4:)
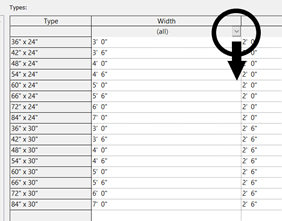
Image 4: The top right of each parameter (column) that can be filtered will have a small arrow. To make a specific option, select the arrow, and choose the option that best fits your needs.
BIM stands for Building Information Modeling and is a phrase used globally to describe a 3D-model based process to enable architecture, engineering, and construction (AEC) professionals to conceptualize, design, and build with intelligent, data-driven processes.
What is BIM Level 2?
BIM Level 2 was a concept first introduced by the UK Government in May 2011 as part of an overall strategy to digitize the construction industry and reduce the cost of public assets.
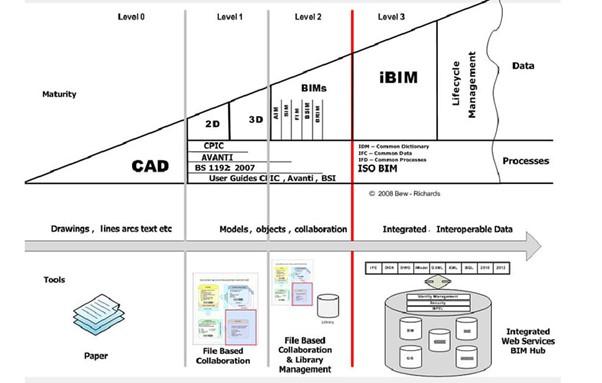
The strategy introduced the idea of BIM levels in order to determine where organizations and the industry were in terms of their BIM maturity and implementation.
The below graphic shows the different levels of BIM maturity:
BIM Level 2 Deliverables
Working within a BIM Level 2 process, the organization must deliver against several key elements to deliver the project. These include:
• Adherence to an Employers Information Requirements (EIR)
• Creation and execution of a BIM Execution Plan (BEP)
• Work within a Common Data Environment (CDE)
• Follow ISO19650 standards
• Use appropriate Classifications (e.g. Uniclass 2015)
• Use Intelligent 3D libraries
• Use Intelligent 3D models
• Use 3D based collaboration
• Deliver COBie
BIM Level 2 Mandates
In the UK, all government-funded projects have mandated BIM Level 2. This means that organizations that are involved in government-funded projects must comply with the BIM Level 2 process.
Other Countries
BIM has been mandated in other countries – however, each country has its own set of specific requirements and standards. In 2019, however, the first international standard for BIM project execution was published, known as ISO19650.
BIM is short for Building Information Modeling.*
Building Information Modeling is a process for designing, constructing, and maintaining buildings digitally. It is used by architects, engineers, contractors and building owners for holistic building design & project collaboration.
Unlike CAD, BIM is not a file type or even a program. BIM is a process of construction documentation that uses parametric components with metadata.
In a BIM workflow, instead of drawing lines that represent walls or doors, architects just draw walls and place doors. And while a CAD door modelled in 3D and a BIM door may look very similar if you were to open them side by side, the difference is in the data.
BIM content is also defined by data. In a BIM project, everything has metadata – information about size, square footage, material makeup, fire rating, finishes, manufacturer, even mechanical, electrical, and plumbing connections.
The other hallmark of BIM is that the components are parametric. This means that architects no longer have to stretch (or scale) the door drawing that was provided by the manufacturer to all the different sizes the door comes in – all the options are built into the component and can be selected quickly and simply by the architect. This ensures accuracy and speed.
BIM is the Process, Revit is the Tool
If BIM is the process, then Revit is the program or software. Autodesk Revit is by far the leader in North America with an estimated 80-90% market share of BIM software. In Europe, there is a little more competition with ArchiCAD, Bentley, and others.
*Side note: Never say “BIM Model” because that’s technically “Building Information Modeling Model.” Just something to keep in mind.
Related: What's the Difference Between BIM and 3D CAD?
Related: What are BIM Levels?
What is Detail Shelf?
Built for architects by architects, Detail Shelf organizes thousands of manufacturer-provided details with powerful filters and intelligent search, so you can find exactly what you need, faster. Unlike traditional platforms that organize around products, Detail Shelf creates a neural network of data where details and products connect both ways. A single detail can feature multiple products, and products can appear in multiple details.
Get in Touch with Us Directly


Featured Brands: