


Help
How can we help?
Whether you're a beginner just getting started with Revit or have some experience, the way you set up your project is highly important to set yourself up for success as you work.
For a quick introduction on how to set up your Revit project using a PDF, base points, or Project North, check out the video below, or the corresponding article from BIMsmith on how to set up a project in Revit.
Watch (7:02):
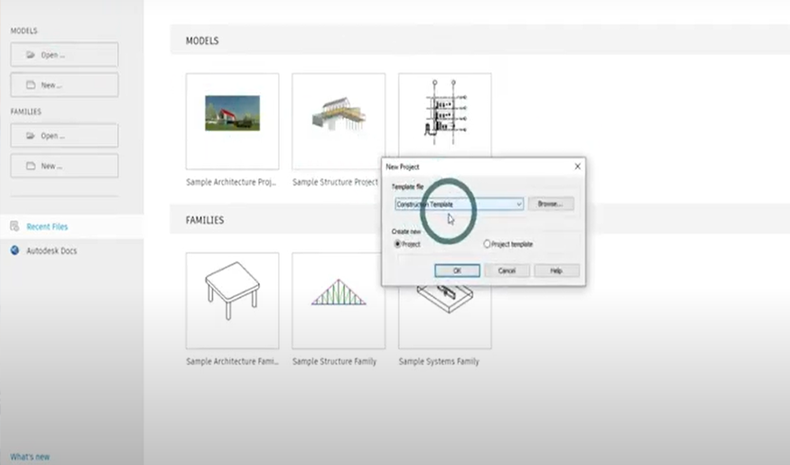
1. Set up Project
Go to the models tab and new, and select the construction template and click okay. Once it loads, I am just going to observe the project and project basepoints and pin them in place.
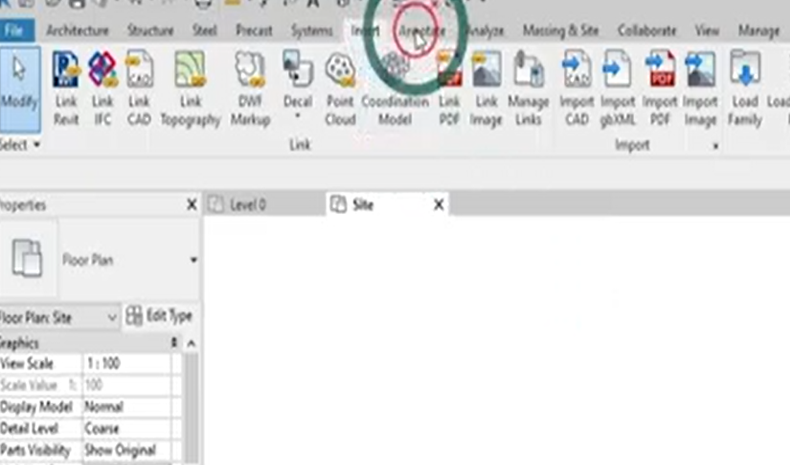
2. Navigate to Insert Tab
Then, we will link the PDF to our project which keeps a live link between the PDF and the save file and the PDF in our project.
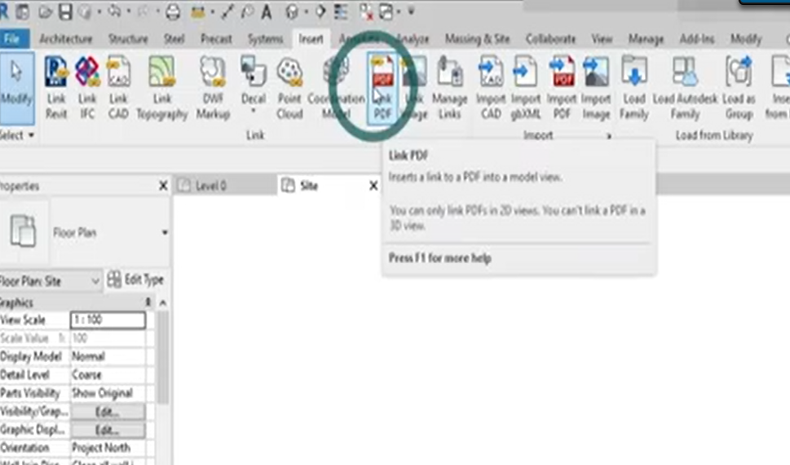
3. Import PDF
You will want to then navigate to where you saved the PDF and open it in your project. It will then prompt you to link the page number that you want to import. Also, you can view the number of pages within the PDF document itself.
Or you can view it as a tile view where you can select and inspect the PDFs graphically and have a better understanding of where the sheet is.
4. Set Resolution of Import
Next, you will want to set the resolution of the import. We have found that 72 DPI can be a bit blurry, and 600 DPI is quite heavy on the project. We recommend setting the DPI to 150, as it brings everything through more clearly.
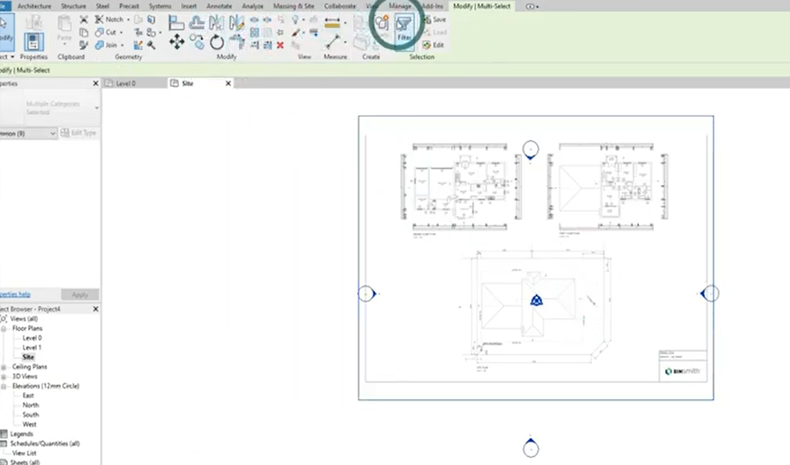
5. Setting up your Project to True North
The first thing you want to do to set your project to True North is to select everything that you can. (Note: in this tutorial we have the selected elements deactivated). Next, we will place the center rotation point at the north arrow of the PDF and select everything once again.
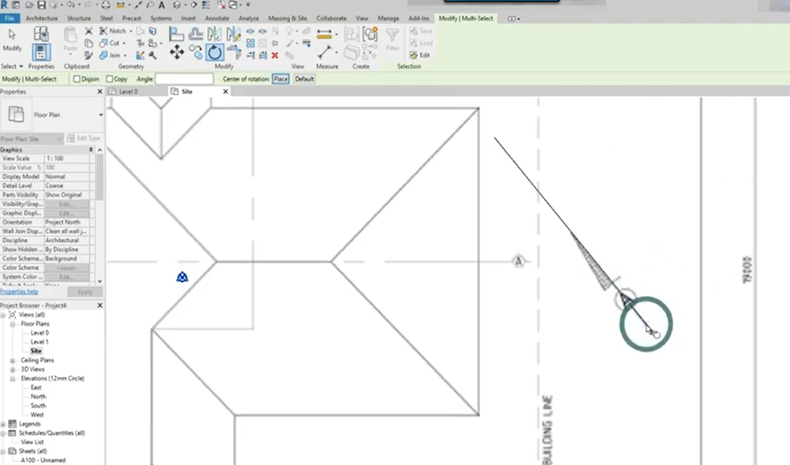
6. Rotate Project True North
Select the rotation or "RO" as a keyboard shortcut, select the placement, and then select the end of the north arrow. Then, we will want to select the reference of the rotation. To do that, we will want to select the north rotation and rotate it vertically.

7. Place a Common Benchmark
Once you have your site in position and everything looks to be in order, you will want to create a common benchmark for others to be able to tie their projects for coordination. To do this, you will want to select the project and type in "MV" and then select the endpoint where the intersection takes place.
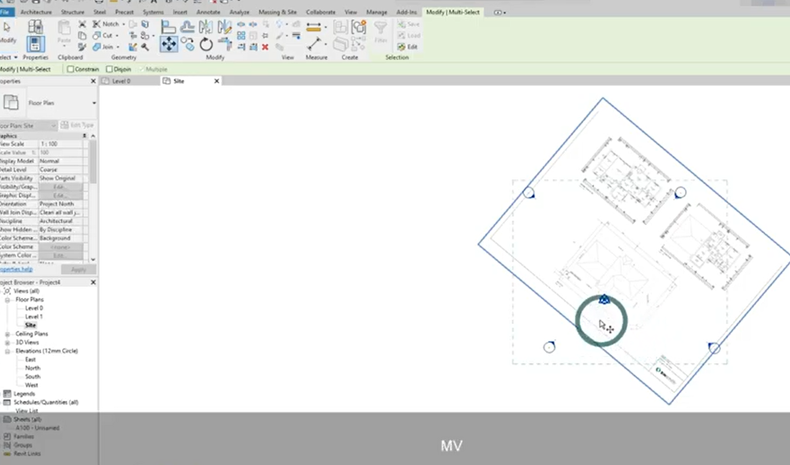
Note: If you were provided with certain information regarding benchmarks, please utilize the survey benchmarks as it is required for better accuracy.
8. Create new Project North
After creating the common benchmarks, you may find that the PDF has become difficult to work with. In order to fix that, you will want to reset the Project North. In order to select the new Project North orientations, you will need to do some detail line placements.
To do this, you can either go to "Annotation" and select the detail line or just type "DL" as a keyboard shortcut. Once you have the new detailed line placements, you will go to the manage tab and go to the project location -> select position -> and select "rotate Project North."
9. Successfully Rotated Project
After going through and rotating it to Project North, it will prompt you to unpin the project basepoint, which you will want to do. Then, you will have to align the selected line or plane and select the top of the site. Once this is complete, you should be prompted with a successfully processed element.
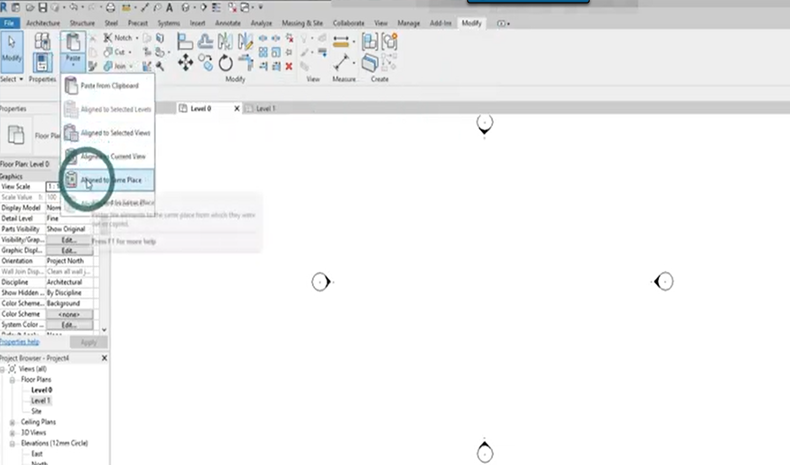
10. Finish Project
Once you have all those in position, you can begin working on your ground floor plans. Select the plans and press "CTRL X", and go to the level 0 tab. Select the align to same place prompt, and then go back to your original site.
Select everything once again and select the pin objects, and then deselect the pin objects so you know which ones are active and which ones are not. Finally, you will want to select everything once again, pin it to location, and you should have your site position, ground floor position, and first-floor position.
Featured Brands: